What’s a Cold Milling Machine or Cold Planer?
Cold milling machines, also known as cold planers (CP), are essential in road construction for removing pavements like asphalt and concrete. Simply put, these machines have large drums fitted with metal spikes that grind up the asphalt or concrete into small bits. This milled material can be repurposed to build new roads or recycled for use in new layers of hot-mix asphalt. Cold planers come in a variety of sizes, ranging from 30 cm to 4.4m in drum width, and each size serves a different purpose.
My Personal Experience Working on a Cold Milling Machine
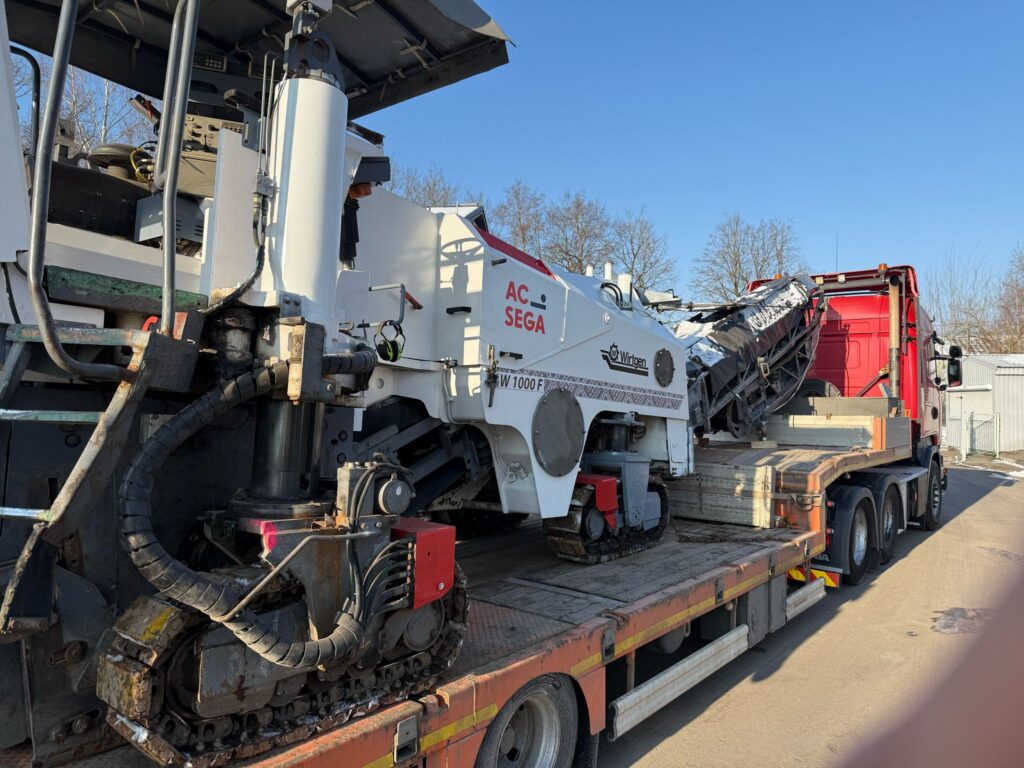
I’ve been operating a cold milling machine for over four years, specifically a Wirtgen W1000F with a 1-meter drum. During this time, I’ve worked on highways, parking lots, tight residential streets, airports, small hangars, and everything in between. As a milling operator, my responsibilities include keeping trucks moving, ensuring the material is properly milled, changing drum teeth, refilling the water tank, and regularly greasing the machine.
One of the biggest challenges of running a 1-meter cold planer is that you have many responsibilities at once. You have to monitor material flow, communicate with the truck driver, look out for obstacles like sewer drains, monitor milling depth, water flow, engine heat (Overheating at 112 C).
The hardest skill to master was learning how to make smooth depth transitions, like shifting from 3 cm to 7 cm and back to 4 cm without leaving bumps or ridges. My first job as an operator is probably my most memorable one. When my company asked if I wanted to take on the role, I said yes, expecting some training. Instead, they gave me a quick rundown of the controls, put me on a go-kart racetrack, and told me: “You have 2 weeks’ time”. Day one, I kept getting stuck and milling too deep. By day three, I found out I needed to change teeth (using a hammer!). On day five, I overheated the machine, wondering if I’d last long in this job. But by day eight, I was yelling at truck drivers for not driving fast enough.
Over time, I developed mechanical skills and learned to use automation features, knowledge that later came in handy when working with asphalt pavers. Operating a cold planer teaches you more than just milling—it trains you to think ahead, adapt quickly, and work efficiently.
It All Starts with the Milling Drum
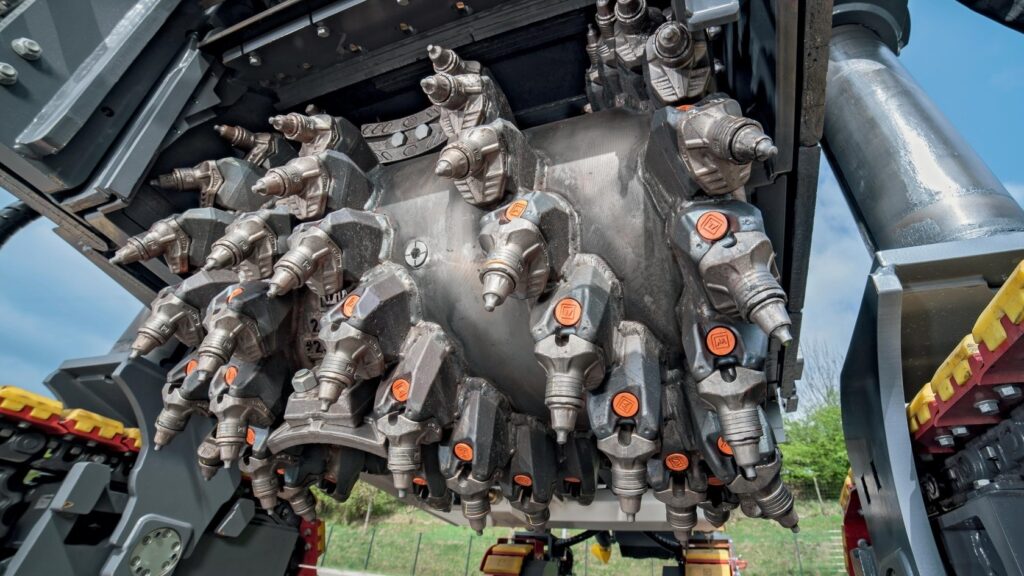
The milling drum spins at 2300 RPM, although this can vary depending on the size of the mill. Larger mills typically operate at lower RPM due to their larger drum sizes. The drum should only be engaged or disengaged when the engine is running in idle mode. While the drum spins, water is sprayed for three key reasons: first, to help keep the drum cooler, second, to minimize dust, and third, to ensure the teeth rotate, helping to reduce wear. The milling drum spins at 2300 RPM, although this can vary depending on the size of the mill. Larger mills typically operate at lower RPM due to their larger drum sizes. The drum should only be engaged or disengaged when the engine is running in idle mode. While the drum spins, water is sprayed for three key reasons: first, to help keep the drum cooler, second, to minimize dust, and third, to ensure the teeth rotate, helping to reduce wear.
For smaller mills, the drum is placed at the back of the machine, meaning only the back cylinders need to be lowered. On larger mills (usually 1.5m and higher), the drum is positioned in the middle, requiring both the front and back cylinders to be lowered.
The drum placement is critical because a drum placed at the back allows you to get closer to the edge of the road or a building wall, which makes a huge difference. Mills with the drum at the back are more versatile, while those with the drum in the middle are better suited for larger areas like roads and highways.
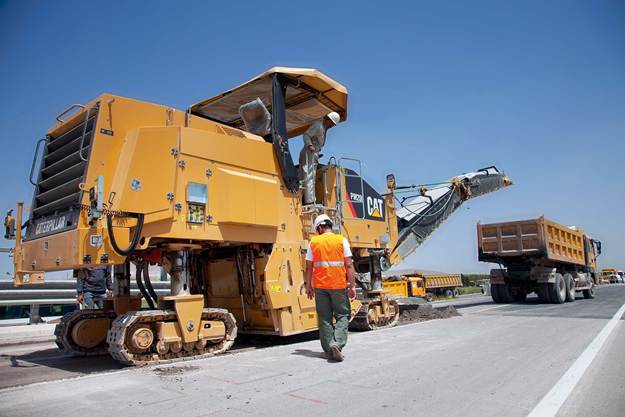
On the Conveyor and Away
Milled material is pushed onto a conveyor that runs over the truck bed. Newer mills feature variable belt speeds, allowing for optimal material loading. Some conveyor belts even have dust removers. Conveyor can either be folded manually or hydraulically, and height can be adjusted depending on the truck bed height.
For some mills, the conveyor is located at the back, opposite the driving direction. In my experience, this is a practical design for small mills that mainly need to move material to the side. However, for larger operations (such as a 1m mill with a conveyor at the back), I find it awkward. The truck has to drive backward, and as the operator, you’re not looking ahead at the road. Instead, you’re constantly looking backward, making communication with the driver more difficult.
Communicating with the Driver
Effective communication is key to ensuring the truck driver knows how close they are to the milling machine and whether the truck bed is full. Most common way of communication is through a radio, though not all mills are equipped with one. In such cases, the operator uses the horn to signal the driver. I’ve used various horn signals to communicate. For instance, one honk means go, two honks mean stop, two honks followed by a pause means full, and more specific honks can indicate other actions. Establishing clear communication signals before starting the job helps avoid misunderstandings.
About Automation
Automation varies from mill to mill, constantly evolving and becoming more precise with advancements in technology. The basic idea remains the same, though—automation acts as an assistant to help the operator achieve the best results possible. Many automation features exist to assist with profile creation and enhance precision.
Here’s a simple rundown of how I use automation:
- Step 1: Use manual mode to lower the mill to the approximate milling depth.
- Step 2: Zero the values and turn the automation on by pressing the A/M button (if using MOBA automation).
- Step 3: Drive for about 1-2 meters and measure the milled depth.
- Step 4: Make adjustments to the milling depth using the up or down arrows.
There’s also an option to create slopes, which is particularly useful when one side is on uneven ground (like a shoulder). In this case, you can switch the uneven side to the slope setting. Ask the project manager for the slope measurements of the road to make the necessary adjustments. Most times though you can just guess or try different values until you find something that works. Honestly it all comes with experience. In time it all becomes second nature.
Thank you for your time!
Leave a Reply